Lets Talk About Gears!

Hello! Lots still happening over here in Evergreen Cyclery land! I have some cool projects that I will begin to talk about. Here is a sneak peak of one such project. Special thanks to the lovely and talented Jenica (Shes all mine and you can’t have her!). Business cards will be here next week!

cropped-evergreen-cyclery-logo-wt.jpg

I am still working on that local post but until then, here are some additional thoughts that I think integrate well with my previous blog post detailing why I buy my bikes used and my attempt at convincing you to do the same.

At the conclusion of that article I concede that there is lots to consider and I completely get how daunting it can be knowing what is important to prioritize when buying a bike and what isn’t. I hope to slowly tackle common features of bikes and hopefully help with forming some opinions for those looking to buy a bike for the first time.

In this article, lets talk about a feature that I think gets entirely too much airplay-gears!

As a kid, I was obsessed with gears. I reasoned that the number of gears that a bike had was the absolute best way to tell how good it was. I remember when I got my Giant Commotion and it had 6 speeds. 6 speeds! Boy, did I think I was hot shit. There was a gear for easy peddling. Like, if I wanted to cruise and take it real easy. That was the same gear I used when trying to keep up with my dad going up hills. Then, when I was in the flats I could dial it down, push real hard (it got harder to pedal) and I would blast off to 18 mph (I had a speedometer!).

Giant Commotion

Pretty much the bike I had as a kid except mine was red and did not have the grip shifters (too old for that).

I thought my Giant Commotion was awesome. A couple of months after getting it, I asked my dad how many speeds his bike had. When he told me 21 like it was no big deal, I was bummed. I could only change into 6 different gears. He could change into 21… No wonder he was so much better at climbing the hills than I was.

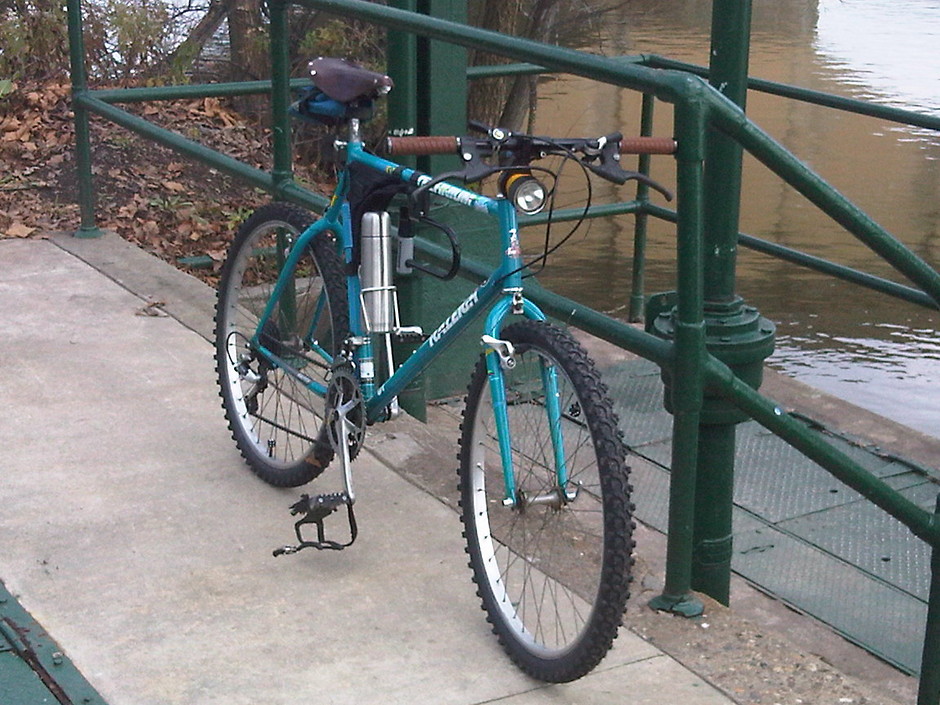
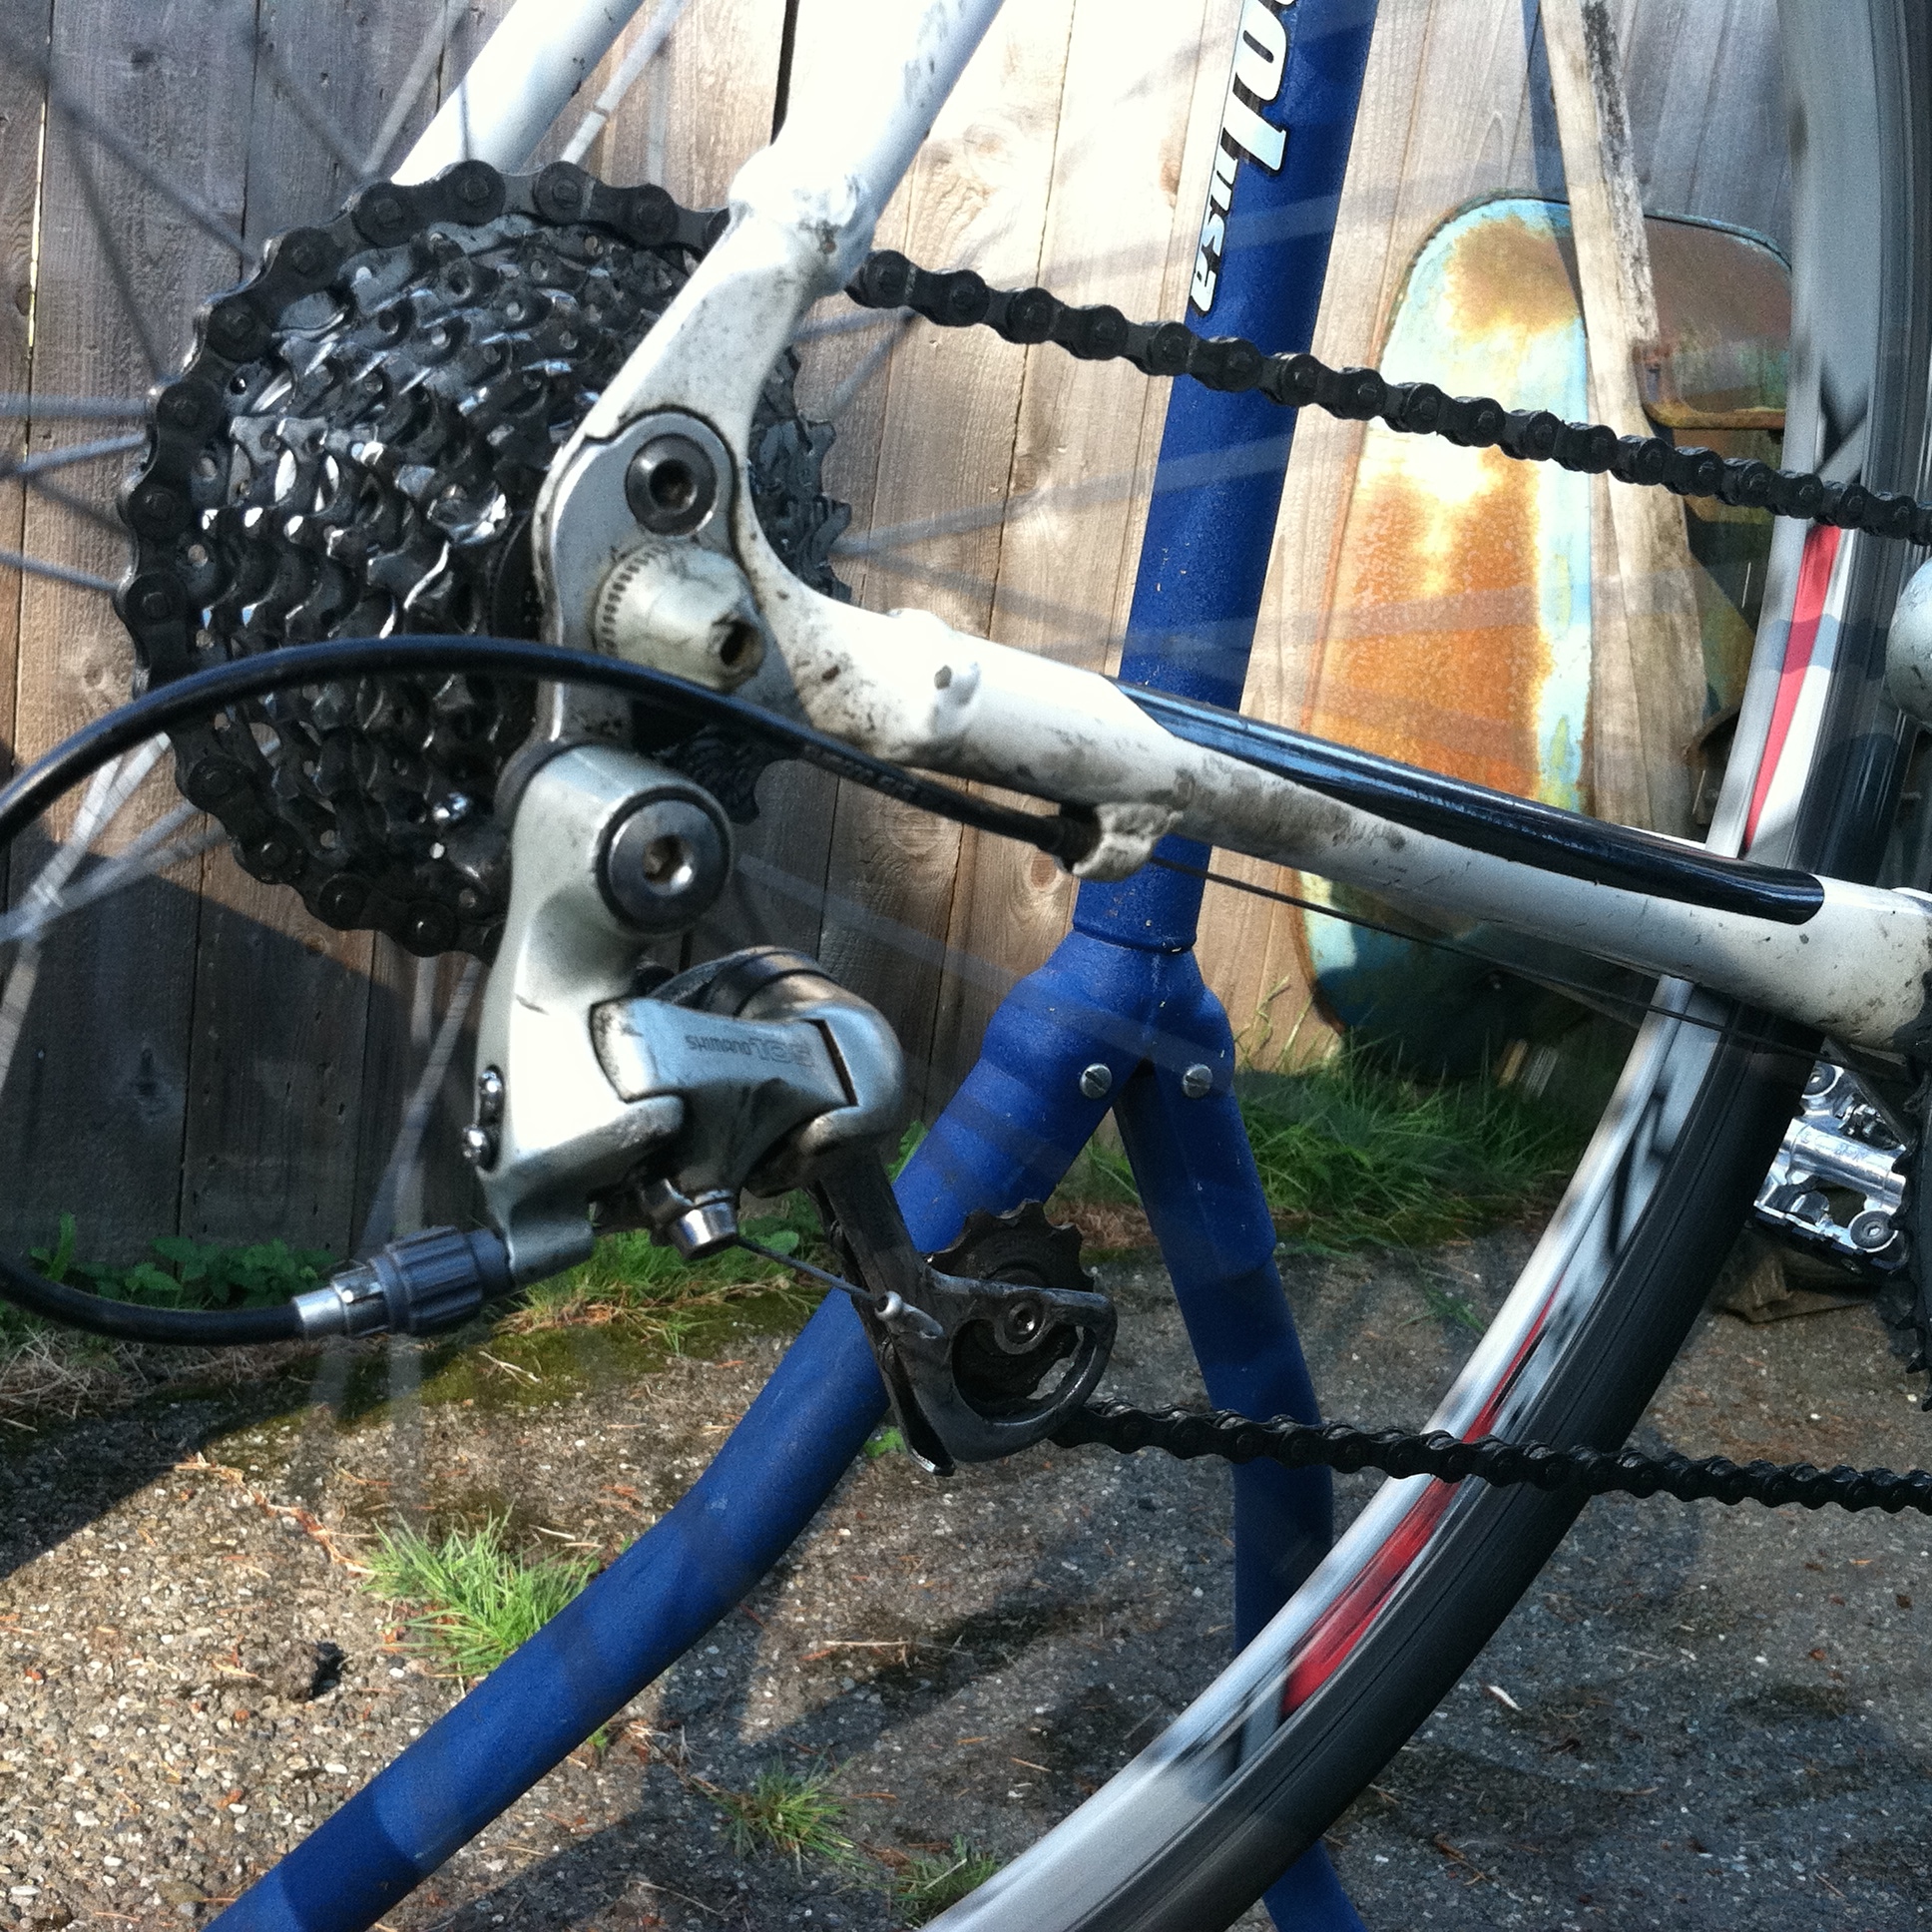
“Modern” bicycle technology now has us all the way up 12 gears. What does that even mean? Well, they are referring to the number of cogs on their rear cassette. Whoa! What is a cassette? There are two clusters of gears on a bike. The Crankset has one set, typically between 1 and 3 gears. The other cluster is attached to the rear wheel and is called a, “cassette.” The cassette can have anywhere between 1 and 12 (apparently) gears or cogs as a part of its cluster. To determine how many gears are on a bike, simply multiply the number of gears on one cluster by the number of gears on the other cluster. As an example, a bike with the cassette and crankset below would be a 27 speed bike (9×3).

Cassette

A 9 Speed Cassette

A Beautiful Triple (3 Chainrings) Crankset

So when we say that modern bicycle technology has us up to 12 gears, that means in theory there can now be 36 speed bikes out on the road. Do we care? Absolutely not! Why don’t we care? Keep reading and I will try by best to explain it.

What makes gears different from one another? It it the number of teeth that each chainring or cog has. On the crankset, the number of teeth on each chainring is usually larger than on the cassette. On the crankset (the front), the larger the chainring, the more difficult it is to pedal. On the cassette (the rear) the larger the cog, the easier it is to pedal. The different combinations between each of the cogs and chainrings allow for all sorts of different gear ratios from extremely difficult to pedal but great for going fast, to extremely easy to pedal but not going much of anywhere (great for climbing a hill).

Does having plenty of combinations of gears make it easier to bike on all sorts of different terrain? Absolutely. I would submit however, that there is a limit to this way of thinking. Rather than worrying about how many gears you have (like I as a young boy did), worry more about what range of gears you bike has.

That 12 speed cassette that probably costs 600 bucks? Probably has a range around 11-28 which means that the smallest cog is 11 teeth and the largest cog is 28 teeth. The other 10 cogs are numbers between 11 and 28. Instead, why not get a perfectly functional 8 or 9 speed cassette that will cost 60-80 dollars. You can still probably get a range from 11-28. The only downside being that the number of cogs between the 11 and 28 is slightly fewer, as you have fewer gears.

Further making that 12 speed cassette less attractive is what they have to do to the other parts of your bike to make 12 speeds work. For simplicity, lets say that the spacing in your frame where your wheel fits is fixed. Well, in order to fit 12 cogs where most bikes have 8 or 9 what do you suppose they had to do? Make them thinner! Along with making the rear cogs thinner, they made the chain thinner (the gaps between each cog can be smaller that way). Sounds great doesn’t it? No! As a result of thinner chains and cogs one also get decreased durability. So that 300 dollar cassette that was maybe good for 5000 miles is now good for only 3000 miles. Not cool. Not cool at all.

In conclusion: Rather than focus on the number of speeds a bike has, concentrate more on the range of those speeds. Most bikes have a range from the low to mid teens, up to the high 20’s or low 30’s. Unless you are sponsored, or money is no object, a bike with 14 to 30 gears should be perfectly fine for most people. Heck, if a bike is bought and the gears ratios just aren’t working out, with very little effort a new cassette or new chainrings can be bought an installed.

Do you remember how many gears your bike had as a kid?

How many gears does your bike have now (assuming you have one)?

Advertisement

Why I Buy my Bikes Used (and Why You Should Too).

So I know that I said that I was going to talk local next. I like to keep my word, but I this is an interesting topic that I have been thinking about and I thought I would share my insights. It also ties nicely into some stuff that has yet to come. I promise I will talk local soon.

The last time I had a brand-new bike was sometime in my teens. For Christmas, I was surprised with a Mountain Tek Boulder. It was a Mountain Bike, 26″ wheels, aluminum rims, nice and shiny red. It is funny because that bike was in my life at a time when I honestly cannot remember much more than that. It was a great bike and I rode it all over.

Then one weekend my aunt and uncle has a garage sale. My trusty Mountain Tek had recently somehow stripped threads on the crankset, making me replace it. I was baffled how silly the whole thing was. I went to a pre-garage sale and found my uncle selling his Raleigh Technium Mountain Bike for $50. It fit, it wasn’t my Mountain Tek (the local used bike shop was willing to buy it from me for $40), and best of all, It was the exact same bike that my dad owned.

Now, my dad was and still is, an avid cyclist. He used to work at Safeco over in Redmond, and-year around from Seattle, he would commute by bike. His winter bike was a Raleigh Technium mountain bike. Unlike the Mountain Tek, I was actually able to find a representative picture of what it looks like:

1989-raleigh-technium-mountain-bike-965_2

That should tell you a little something. It should also be telling that Mountain Tek is no longer in business…

As a 15 year old, I was absolutely stoked to have the same bike as my bike warrior of a dad. Not three hours after I had acquired my new Raleigh, my dad convinced me to sell it to him for $20 plus his Raleigh, as his had definitely seen some miles. Eager to make a quick $20 at the age of 14, I went ahead and made the deal.

Why do I tell you this story? How does this tie into me advocating for buying used bikes? Well, I received the Mountain Tek new. MSRP on a 1996 Mountain Tek Boulder is $249-that is to say, it was a fairly entry level bike. The Technium, safe to say, retailed for quite a bit more than that-it was defintely a late 80’s mid-range bike. In 2007, I finally sold it to a gentleman in Bellingham who had every intention of riding it longer. Below, is a list of points why buying a used bike might make sense for you.

Bike technology is not as rapidly evolving of an industry as they want us to believe. The bikes made 20 years ago have very few technological differences from the ones sold new today. As long at the frame fits your needs, any of the other parts can be changed out anyway.

Jenica and I trying out our new Tandem!

Jenica and I trying out our new Tandem!

Bikes can still be classified as fitness equipment. I think everyone has, or knows someone guilty of buying a treadmill around New Years only to use it for a few months and then have it sit in the basement before being sold at a garage sale or craigslist for maybe 10% of what was paid for it. Bikes are very much, for the average person, fitness equipment. It is not hard to stumble across lightly used bikes that people are happy to see go, and the prices reflect that.

exercisebikeGet so much more for your money! My story should illustrate this well. Sure it was nice to have something shiny and new, but  a few months of riding in the rain do you think it really made much of a difference? Stopping in at bike shops and looking at the latest and greatest (and how much they want for it) can be quite fun. It is astounding how much buying a new bike costs these days.

Customization! Buying new also assumes that you want to buy exactly what is for sale. Parts evolve and so do frames. Do you think that top of the line race bike built in the 70’s or 80’s is that much heavier or poorly built that that mid to low range bike you bought fresh off the bike showroom floor? Maybe you don’t like the ride feel of steel, aluminum, titanium, or carbon? So don’t ride it. I was surprised to find that many of the entry level road bikes sold today are almost all aluminum. I personally prefer steel to aluminum so rather than pay a premium for modern steel, why not get something with some character and a little age?

76-international

international-005

Here is a personal favorite of mine. The Raleigh International is a wonderful touring bike made in the late 60’s all the way up until the late 1970’s. I find the ride quality and geometry of this bike to be wonderful (I own a 1974). On the left is the original bike out of the catalog. One the right is a customization that I found on another blog (https://veloapocalypse.wordpress.com). Looks like the parts were modernized, and a more relaxed ride was created with more upright handlebars and stem. Bar-end shifters replace the down tube shifters the bike was originally equipped with.

As an aside, As of 2011, Raleigh is making the International again! The cost? A cold $3990…

After writing all of this out I concede that it can all be daunting for someone that is looking to get a bike for the first time. There is so much to choose from and short of spending lots of time testing everything, it is hard to know what to do. Take heart! There are many resources out there that can answer these questions, myself included!

What is the biggest hurdle to you buying a bike (assuming you are thinking about it)?

What are any concerns you have about buying a used bike vs. a new bike? 

Chains Round 2!

Ok so after a fun filled morning, re-depositing my unspent money from the bonus bike swap back into the bank (never, ever happens), and some fuel in the form lamb gyro goodness, I head over to install two chains on two bikes belonging to Joe, one of the, “bike buddies” but also the father of Jenica. We get right to work and put the first bicycle up on the stand. His first road bike, a Raleigh that he acquired, of all places, at the bike swap (see previous post)! If you remember from my previous post what I mentioned about chain stretching, the chain tool indicated wear between 0.5% and 0.75%. Not absolutely terrible, but probably a good idea to replace. Now when replacing a chain and nothing else, one has the benefit of simply removing the pre-existing chain and making the replacement the same length. Since this is the scenario we have for both bikes we are working on today, it is the one I will roll with. Before we get started, it is important to take as much tension out of the chain. Shift into the smallest cog in the back and the smallest chainring in the front. This makes removing the chain much easier. Now in order to remove the chain, a chain removal tool is needed. Its basically a threaded press that pushes a pin on the chain out allowing you to break a link. All sorts of manufacturers make them. I am partial to my Park Tool CT-5. The trick is to make sure that the pin on the press matches up with the pin on the chain. IMG_0600 Once the pin is pushed all the way through, simple twist and the chain should break. IMG_0602 Note how I kept the pin still in the chain, at first it can be very tempting (and easy) to push the pin all the way through. DO NOT DO THIS! Getting a loose pin back into a link can result in much swearing and it best avoided. One the chain is free from the bicycle, we lined up the new chain right along side the old chain to determine how many links to remove from the new one. IMG_0596 Our new chain is 116 links whereas our old chain is 111 links. Therefore, we removed 5 links from the new chain to make it the same length as the old. Installation is the same as removal, except in reverse. It is important to feed the chain through the derailleur pulleys the proper way. You know those two black wheels on the rear derailleur? Thats what we are talking about. Known as Idler wheels, Jockey wheels, or Derailleur pulleys. They feed through in sort of a reverse “S” pattern. IMG_0620This isn’t the best of pictures, but at least here the bottom half of the reverse “S” is visible. Try and imagine the top half of the reverse S. Most derailleurs have guides that let you know you have fed it through properly. Once fed through the derailleur, grab the trusty Park Tool CT-5, and push that pin back into the chain link, reconnecting it. IMG_0597Sometimes pushing a new pin into a chain link will make it stiff and less flexible. Some oil and some pressure applied by bending the chain back and forth should loosen it right up. Once the chain is properly linked, it is time to see how it looks in extremes. Specifically, keep an eye out that the chain is not rubbing against itself in the smallest setting (smallest cog in the back and smallest chainring in the front). IMG_0605 It is not super easy to see here, but I actually do not like how the chain is either rubbing already against itself, or awfully close.  I’m thinking we should remove a link, but before that I want to see how it looks in the “big” extreme setting. With the biggest setting, (largest cog in back and largest chainring in front) make sure that the derailleur is able to shift all the way up into the biggest cog. IMG_0610 So this looks alright. Since I would like to take a link out, I am also looking to see if it could handle having another link removed. It looks like it can, so lets remove another link! After removing a link (done the same was as above) this is what the “smallest” extreme looked like IMG_0605 You can see the gap between the chain and the derailleur shift arm has gotten larger. This satisfies us. We also check the “big” extreme again. All systems go! This was an interesting replacement, as the assumption that the chain was installed with the proper number of links turned out to be incorrect. Would the bike performed functionally with extra links in the chain? It already had for a couple thousand miles. Still it is nice to have equipment dialed in properly, and a bicycle is no exception. Moving on to the next bicycle, I think I will save you a complete rehash (I forgot to take some photos).  The second change was smoother than the first. We debated about taking out another link but Joe wanted to ride it and let me know as it wasn’t as bad as the first chain. After we were done, we lubricated both chains by applying oil dropwise while pedaling and shifting through all of the gears. The is an important step to ensure that you get as many miles out of a chain by protecting it from dirt, road grime, and water. In summation, chains are pretty neat to work on. Making sure that the chain length is right is integral to a positive bicycle riding experience. If possible, wear gloves. UP NEXT: I want to talk locally a little bit.

Bike Swap 2014 Bonus Round!

Before I tell the rest of the story on chains, we have a brief interlude also known as one of two craziest bike-related days of the year…the Cascade Bicycle Clubs Annual Bike Swap! Now this year is unlike any other in that we actually had two swaps this year, as the first happened to fall on a day, that we in Seattle were simultaneously hit with some snow (February 9th). This extra swap was sort of a bonus, but also an wild-card as the energy around the sport is definitely different in February (beginning of the season) that it is in late September (end of the season). It is for this reason, among others that I decided to scope it out as a buyer before dedicating to being a seller.

I believe that these bike swaps merit mention, as biking can be a surprisingly expensive sport and any opportunity to keep costs down (those spandex bike shorts everyone likes to make fun of ain’t cheap!) is worth consideration. It is a mixture of bike shops getting rid of excess inventory, bike teams going in for members to sell stuff, and people like me, who on occasion, accumulate way too much stuff and need a way to get rid of as much as possible and fast! Its also sort of a who’s who of bike shop owners, employees, and incredibly colorful people that you see once a year (without fail).

Now, I have played the role of both buyer and seller at these events. This is the first time in a few years that was strictly a consumer and was looking forward to it. I wan’t going in with any items that I absolutely have to buy, I could just let the sale and the deals come to me. Jenica, still eager to try and commute to school, had a nice list of stuff we were looking for: some panniers, a carrier, fenders, gloves, and a headlight. We arrived down at the Seattle Center Exhibition Center promptly at 8:50 (doors open at 9:00), and were immediately greeted by this: IMG_0590 Not too bad all in all, but maybe a shock to the uninitiated. Upon descending into the depths of the Exhibition Center it rapidly turns into sensory overload. Bikes, parts, clothes,  samples, bike art, bike consignment-its all packed in there. IMG_0592 From 9:00 until 12:00 we made our way all over a maze of anything and everything bike and bike-related. Watching people buy a bike for the first time is fun. Engaging in the negotiation with sellers (its common practice) can be a thrill as well. After the first hour and a half, Jenica had spent her limit but was through the roof with excitement on all the stuff she was able to find (headlight not pictured). IMG_0628 I had a few bicycles catch my eye, but was content picking up a few spare parts and helping my father secure a few things. Here is a photo of my haul (trust me, by far the smallest and well-managed it has ever been). IMG_0629 There are a few items that I would like to bring particular attention to. Both came from Portland and both came from extremely nice people that absolutely deserve to have their work supported. The first is the wonderful glass window pendant made by Brian Echerer of Vela Gioielli. Brian was super nice and friendly and was even kind enough to pose for a photo (photo credit Jenica)! IMG_0630 The second are these super cool shirts that both Jenica and I got from Microcosm Publishing. We both are super excited!

After about three hours, we were both pretty exhausted. It is a pretty intense atmosphere and only slightly less so if you are buying and not selling. There are deals to be had and they are pretty impressive. Who knows, you may find that mint 1960’s french threaded one-off that you will never be able to find ever again. If you are looking for something fun to do early on a Sunday morning in February, I highly recommend stopping in. Double that if you are in the market for a new bike. Even if you leave empty-handed, at the very least the people watching is top-notch (take my word for it).

UP NEXT: After a crazy morning of wheeling’ and dealin’, I install two chains on two bikes. Lots of good stuff and lots of photos!   

A Shoutout to Chains!

Chains have been on the mind recently. Of all of the components on a bike, I think one would be hard pressed to find one as under-appreciated as the chain. The chain is directly responsible for transferring all that torque when one pedals, to spinning the (rear) wheel. As bicyclists, we are told that roughly every 2500-3000 miles we should spend 20-50 bucks on a replacement. To go longer than that, one risks unnecessary wear on the more spendy parts on the drivetrain (cassette, chainrings etc..).

My very own Park Tool CC-3.2!

If you are anything like me, arbitrary numbers like how many miles before service, is a rule that I aim to break (just ask the people that change the oil on my car). I want to make sure that when I actually do replace any components on my bike that they are actually in need of replacement. There has to be a measurement (I am a chemist by trade), that indicates that a chain is in need of replacement. Enter the Park CC-3.2 ! For 11 dollars, I now know when a chain has worn .5% or .75% or more! What exactly does that mean and why do I care?  All of the aforementioned torque provided by the muscles in ones legs is pulling the chain apart ever so slowly. One link on the chain is being pushed by one tooth on the cassette.

At the same time, one link is being pulled (same direction) by a tooth on the chainring. Speed things up, all of the teeth on both the cassette and the chainrings take turns as do the links on the chain (as you pedal). Ever wonder why the smaller chainrings tend to wear out faster than the larger ones? One of the main reasons is because there are less teeth to take a turn before they are up again!

After putting the chain in the 0.5% of the Park Tool CC-3.2 Chain wear indicator, we see that the chain has stretched at least 0.5%.

The very same chain, we now test for 0.75% wear. Since it is not a fit, (it doesn’t notch down), we can conclude that the wear of this chain is somewhere between 0.5% and 0.75%.


The first couple thousand miles the chain can handle the pushing and pulling no problem, but eventually that poor chain relents and starts to give in and stretch. It only has to stretch 0.5%-0.75% from its original length before it is trash. Why you might ask?

Here is a brand-new chainring. Notice the symmetry on each of the “teeth.”

Well, suppose you ignore the rules and keep riding, whats the big deal? Lets suppose the chain has now stretched 1% longer than what it started as. Now, each link in the chain is linking up with the teeth on the cassette and chainrings 1% away from where it started. Remember before how we learned how robust chains were? Well, this is intentional and the result of the chain being constructed of extremely hard, brittle metal alloys. Harder than those used on both cassettes and chainrings. Slowly after time, in the battle waged between the chain, and the cassette or chainrings, the chain will “win” and start to wear the others to this new stretched pattern. This mere 1% shift in chain alignment begins to manifest itself in ways such as sloppy shifting and jumping cogs.

Here is a worn chainring. This came off a friends bike. He was having some skipping and his shifting was not smooth-this was a culprit.

Eventually, the wear will get to the point where the chain, cassette, and chainrings will all have to be replaced simultaneously, as all have worn to the imperfections of each other. Think of it as an old group of friends or drinking buddies, that have been meeting up weekly over the years. Do you really think a newcomer could break into that?

In summation: Check your chain for wear periodically! Sure, be a rebel and go a couple extra thousand miles (I do every time I get my oil changed), but if you are going to push the envelope, get yourself a Park Tool CC-3.2, and be aware of the potential consequences.

UP NEXT: Eager to use my new chain wear tool, I find that Jenica’s dad is in need of new chains on both of his bikes. We are going to install them and make sure that both shift like new when we are finished. Stay Tuned!

Welcome!

I have finally made the push and am up with a website/blog dedicated to a topic that is near and dear to my heart-bicycles! I love most anything about bicycles. The frames, the frame materials, components, geometry, the different styles. Working on them. Riding them all the neighborhood, city, state, and country (ok, only a little bit). It is amazing all of the places that a bicycle will take you if you let it, and there is something extremely calming for me about that.

I hope this becomes a place where I can, and will write about bike-related topics. Whether it be some bike history, bike repair or anything else that strikes me, I would like to write about it. In addition, through this experience, I hope to encourage more dialogue with the bicycling community and the members within it. I would love to work on more bikes! If you would like a tune-up, build-up, or retrofit, I would love to hear from you! If you have a bunch of bike gear that is filling up your garage or room (I know the feeling) I would like to talk to you about consignment. As I mentioned I do sell somewhat regularly on eBay and if you would like assistance liquidating excess bike stuff, I am here ready to assist. If you need help shipping a bike across the county (or world), I would like to help, as I have done both successfully many times. Finally and maybe the most exciting: If you are one of those people that is looking into getting a bike for the first time, please please please talk to me! There are so many little nuances to bicycling that I wished I knew when I bought my first few bikes, and I would love to share those. Heck, we can talk about what you are looking for and I can hunt for it!